
Whether you’re moving into a new home, apartment, or office space, it’s natural to start thinking about what you’ll change first. When I decided to hang wallpaper in my home office (thanks, Instagram), I learned the hard lesson that the larger the pattern, the more challenging the paper will be to hang. And yes, I know those of you who have lived through prior wallpaper fads are probably thinking, “You fool!” But here we are. While I learned a few new tips and tricks from the wallpaper project, I had no idea how much I was going to learn during our next big undertaking: home electrification.
When my husband, Ben, and I purchased our 1926 home in the Bancroft neighborhood of South Minneapolis in early 2021, we knew we had lucked out. The windows were relatively new, the roof was in good shape, and the inspector said our insulation was okay—not too bad! But when we decided we wanted to explore what it would take to electrify our home, which included moving away from our fossil gas-powered boiler for heat and adding air conditioning, we knew we needed more information—lots more information—to make an informed decision.
If you’re reading this, you’re probably interested in home electrification. While every project in every home is going to be different, I wanted to share our process so you can start figuring out what questions to ask about electrifying in a cold climate, and just as importantly, who to talk to so you can feel confident electrifying in Minnesota or other cold climates.
Why electrify?
But first, why electrify? If you’re in Minnesota and reading this you hopefully have a working heating system, so why switch to a heat pump? For us, the logic was pretty simple. We wanted to reduce our carbon impact while also reducing our monthly bills. Switching heating systems in cold climates off of fossil gas in a cost-effective and comfortable manner is one of the best ways to reduce our carbon impact. So, did it work? Read to the end to find out!
By the way, I can already tell this blog post is going to be long. I had a ton of questions going into this process and learned a lot along the way and I want folks considering this kind of work to be able to learn from my process so I’ll risk being overly verbose.
The first phase of our process was to consult the experts. We didn’t even know how to start framing our questions so, we called the experts: Center for Energy and Environment (CEE).
Phase 1: Information gathering
An important first step before making moves on home electrification is to get your house in order—literally! Cold-climate heat pumps work well, but only if you set them up to succeed. Many older homes in Minnesota may need significant weatherization and even pre-weatherization to ensure your electrification project will be cost-effective and comfortable. Weatherization is the practice of protecting a building and its interior from the elements, particularly from precipitation, wind, and inclement weather, as well as modifying a building to reduce energy consumption and optimize energy efficiency. Questions about how heat pumps work? Check out our explainer blog.
To do that, most utilities in Minnesota have programs in place to help their customers do a home energy audit. My utilities are Xcel Energy and CenterPoint Energy which work with the Home Energy Squad, a program of the Center for Energy and Environment. The Home Energy Squad visited our house in July of 2021 and spent a few hours running tests, replacing old light bulbs (nine to be exact!), installing weather stripping, and more. In addition to getting some free upgrades (like the lightbulbs) during the visit, we also got a full report outlining our “Energy Fitness Plan.” The upshot of which was twofold: 1) Our windows and insulation (or weatherization) was good; 2) Our gas-fired hot water heater was identified as a safety risk because of its age and unsealed ventilation which can allow combustion gases to spill into the home.
Our attic insulation was rated R-value of 44.0 (out of 50) and our sidewall insulation consisted of 3.5 inches of loose-fill fiberglass insulation with an R-value of 10.8 out of a recommended R11. Most of the windows in the house were double-glazed and all had storm windows. This put us in pretty good shape if we wanted to proceed with work on home electrification. It’s important to note that if you need significant weatherization improvements, it’s best to complete that before moving forward with cold-climate heat pumps.
A few quick notes before we move on to the next phase. First, thanks to the federal Inflation Reduction Act (IRA), every household can get a $150 tax credit for a home energy audit through the end of 2032—wahoo! Second, in order for us to have access to CEE’s Loan Programs, which I planned to utilize, I needed to have a recent energy audit on file. Third, if we did decide to finance our home electrification project through CEE, we’d need to take care of our risky gas hot water heater, too. And fourth, we planned to keep our gas-fired boiler as backup heat for extreme weather days, although after our first winter with the heat pumps, we are confident enough in the system that we are exploring removing the boiler.
Your Energy Matters.
Clean energy is a critical climate solution!
From inspiring stories to actionable insights and practical tips, get everything you need to make an impact in our monthly e-newsletter.
Sign Up TodayPhase 2: Scoping the project
Now that we knew our home was in good shape weatherization-wise, we decided to begin exploring the electrification process. Neither my husband nor I have any background in engineering so we found ourselves relying heavily on contractors to give us advice on what the project could look like. Over a few weeks, we had eight Twin Cities heating and cooling companies come through the house and ended up with a potpourri of potential solutions. From just one mini split unit to serve the whole house to recommendations to keep our gas water heater, the advice ran the gamut. And in a few cases, we felt the contractors didn’t take our goal of using the heat pumps as our primary heat source year-round seriously at all so it’s a good thing contractor education is included in the IRA!
If you’re not sure what questions to ask a potential heat pump contractor, one resource is this HVAC 2.0 Contractor Interview Form, created by electrification champion Nate Adams as part of “HVAC 2.0.”
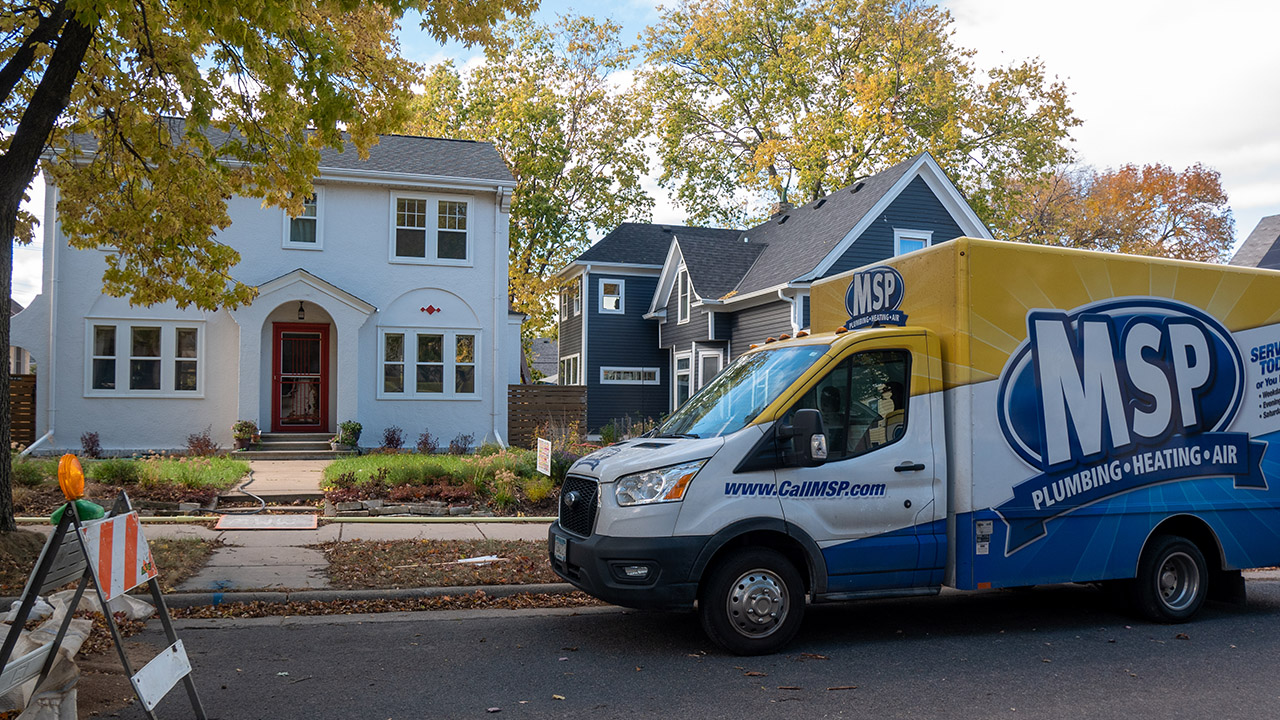
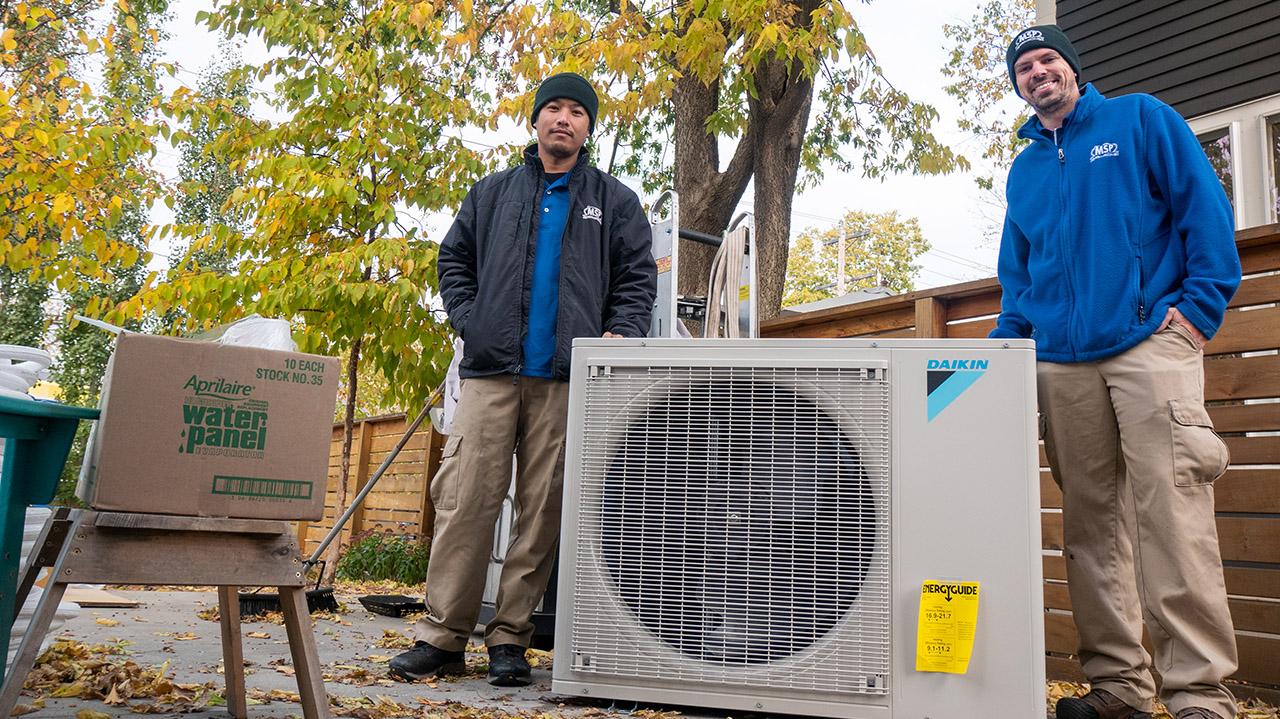
Ultimately, in July 2021 we determined that MSP Plumbing, Heating, and Cooling understood our goal, and offered a package to achieve it. We felt comfortable moving forward thanks in large part to the unfailing guidance and responsiveness of Nick Bender, the heat pump genius on MSP’s sales team who has been selling and promoting heat pumps before they were cool. Nick presented us with three configurations for our 1,742 square foot home, and ultimately, we chose to have two zones that consisted of:
- Outdoor unit: Daikin 4MXL Aurora Cold Climate Heat Pump with a cooling and heating capacity of 36,000 BTUs.
- Zone 1 (second floor): Daikin 12,000 BTU Mid-Static mini-split air handler with a built-in backup electric heat kit installed in the attic with vents into the second-floor rooms.
- Zone 2 (main floor): Daikin 15,000 BTU Ductless Mini Split Heat Pump System Air Handler mounted in the living room. It should be noted that the floorplan on our first floor is relatively open, which made one air handler on the main floor an option for us.
- When it rains it pours. We had some additional work rolled into the project for efficiency and to optimize costs:
- Heat pump water heater: We had MSP include the installation and wiring of a new heat pump hot water heater to replace our risky and aging fossil gas water heater.
- Panel upgrade: Our 100-amp panel was relatively full and while it could probably have supported the heat pump, it would not have been able to also support a heat pump water heater and induction stove. We asked MSP to include an upgrade to a 200-amp panel into the work.
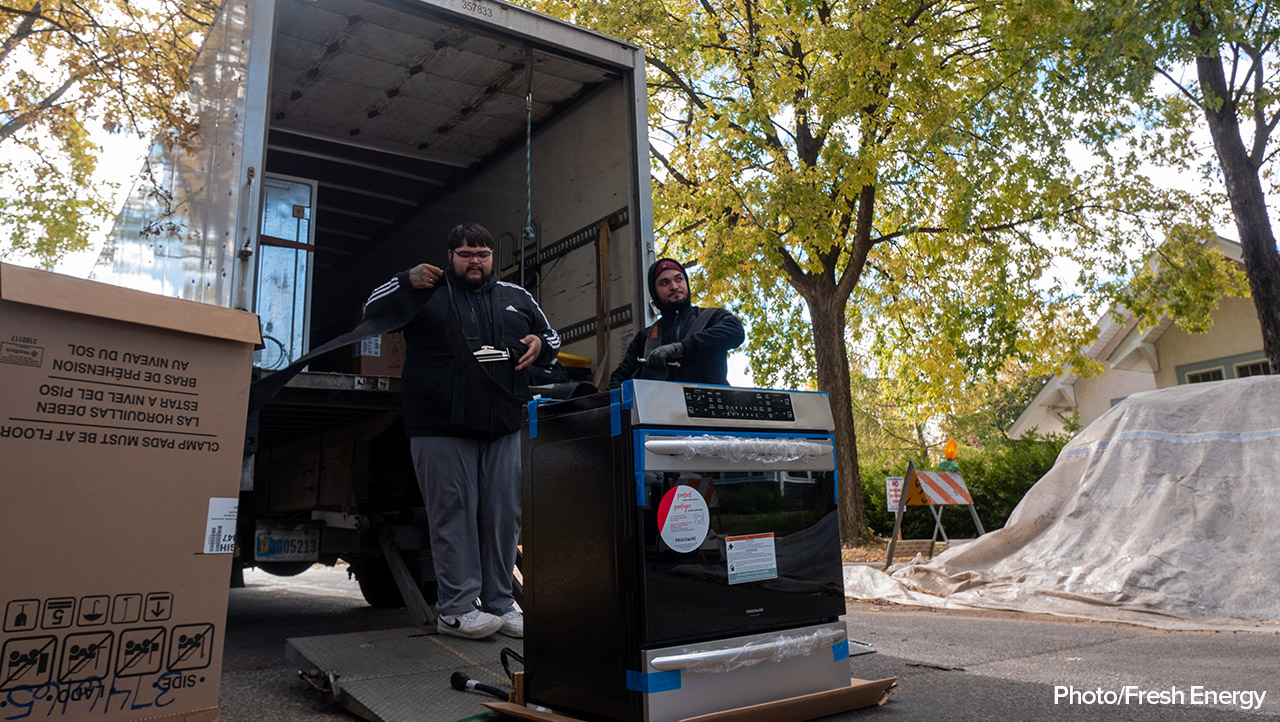
- Induction stove: With more data demonstrating the health hazards of fossil gas stoves and my husband’s history of asthma, we opted to replace the gas stove with an induction stove as well. We bought the stove from Lowes, but the MSP team both capped the gas line and their electricians installed a 240-volt outlet for it in the kitchen.
Phase 3: The work begins
Once we landed on a heat pump system and scope of work with MSP, we locked in an installation date a few months down the road in September of 2022. A few surprises came up along the way including supply chain hiccups and a little something called the Inflation Reduction Act—the biggest and most impactful federal action on climate in history.
A key element of the IRA is consumer incentives which include tax credits starting in 2023 for a whole range of consumer products—including heat pumps, heat pump water heaters, panel upgrades, induction stoves, and more. Basically, everything we were planning to install in 2022. After much debate, Ben and I decided to proceed with the project in 2022 before the tax credits would kick in. We made this call because even before the IRA was signed into law, we were experiencing supply chain issues with the Daiken products we hoped to install and we were concerned supplies would become harder to get, prices would rise, and contractors with know-how would be in even higher demand.
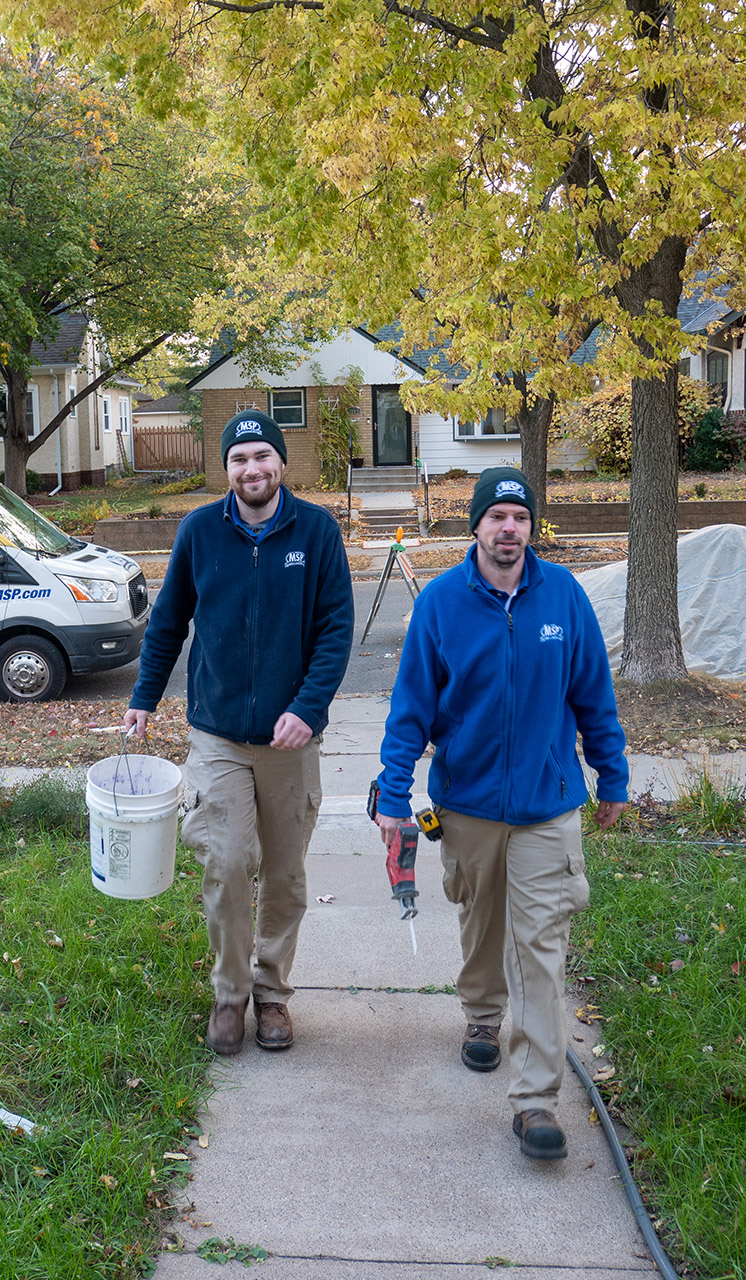
This brings us to October of 2022 when over a period of two days, about 80 percent of the work was completed by about 10 MSP employees. Being the energy nerd that I am, I hung out with the very patient and kind MSP team for the whole two days, taking pictures, asking questions, and learning everything I could along the way.
On the first day of the project, no fewer than six MSP trucks pulled up to our house bright and early. After laying plastic sheeting in the walkways, the team split up and got right to work. With 10 people on the job, work began immediately on every facet of the project and below I’m going to do my best to outline what happened for each element of the project over the 48 hour install period.
Zone 1: Second floor
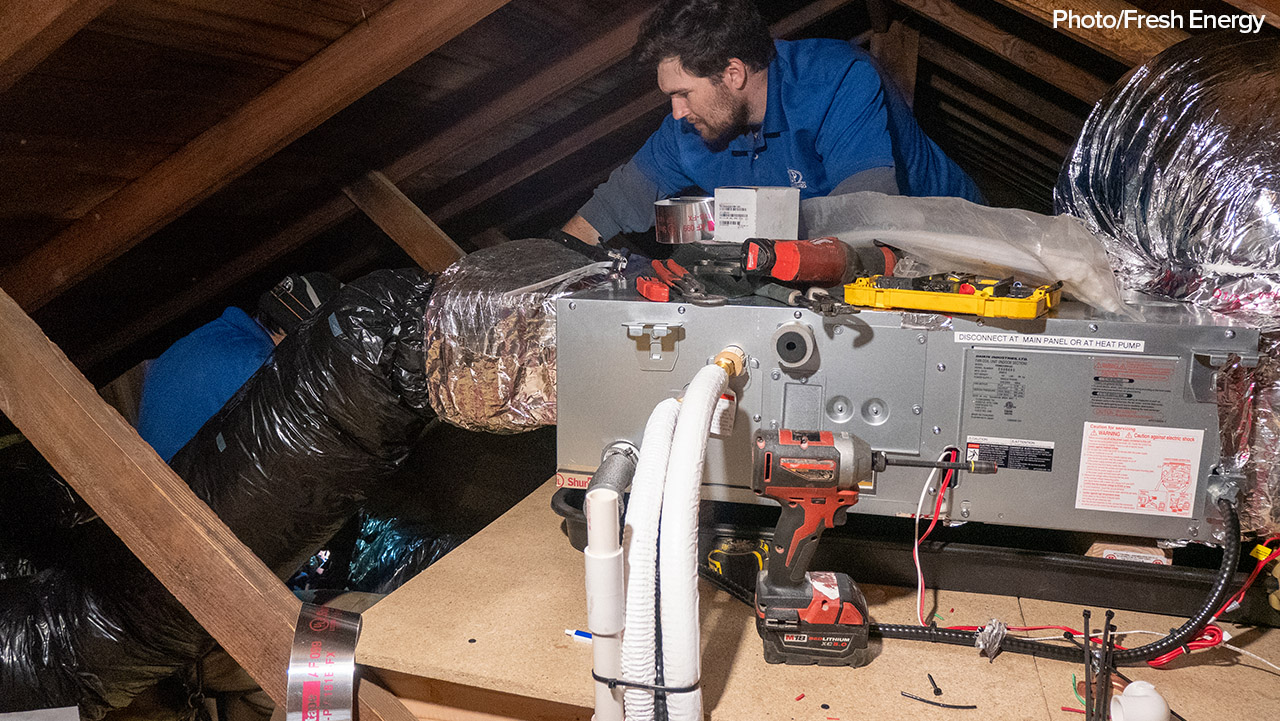
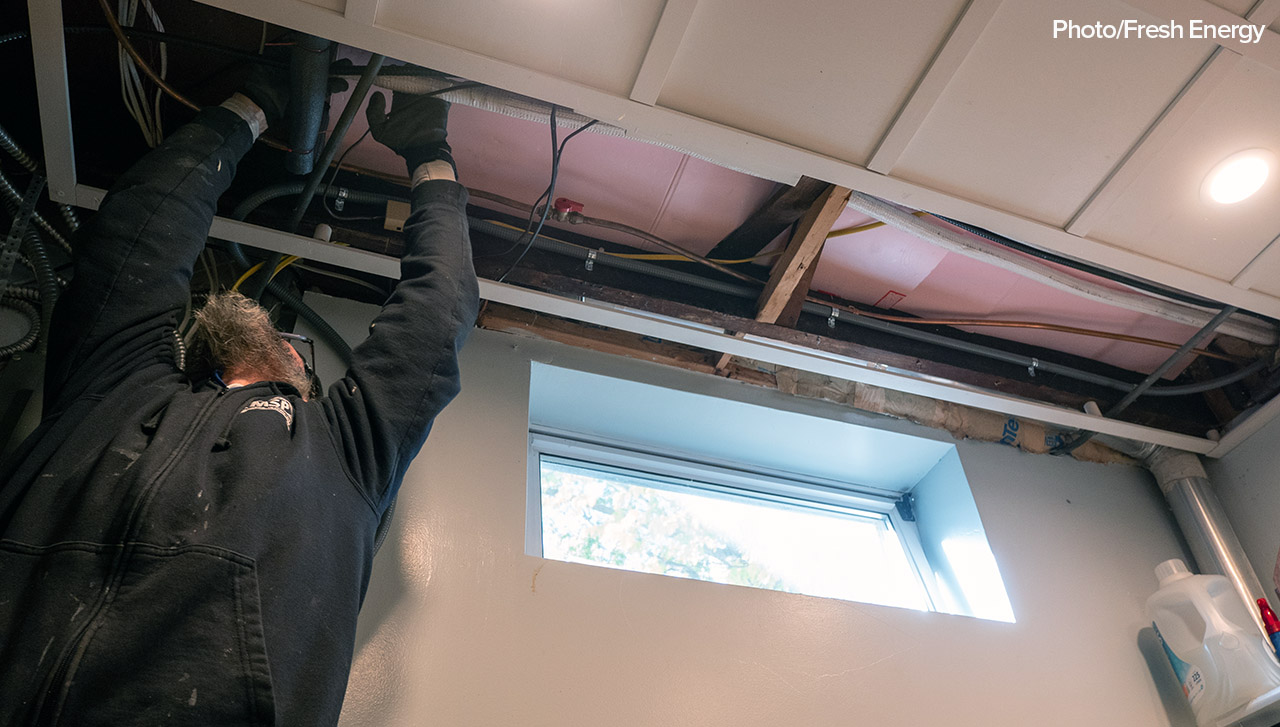
The attic unit for the second floor of the house, Zone 1, required far more prep and installation work than I had originally imagined. A team of four spent nearly two entire days going up and down from the attic to:

- Prepare the space. The first thing the team did was disassemble the gigantic indoor TV antenna (surprise!) from the 1970s.
- Do some carpentry. The team built and mounted on the attic beams a large wood platform that the head unit and its code-required drip tray would sit on
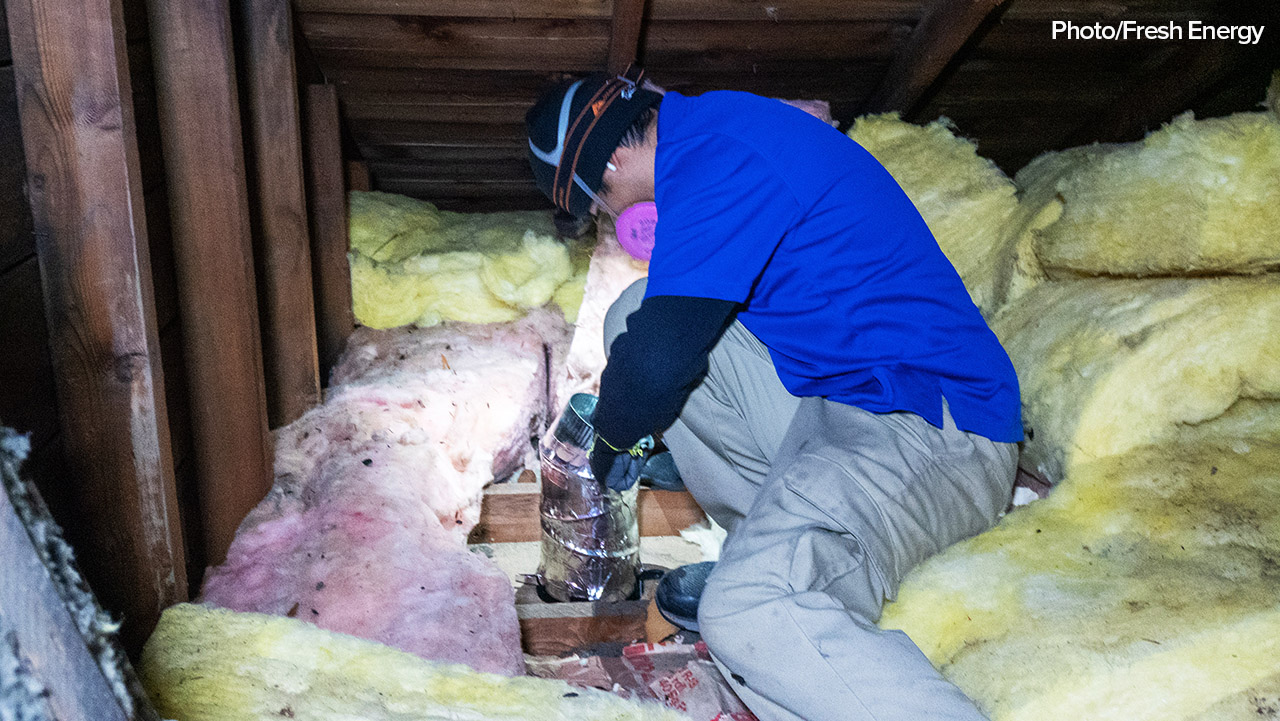
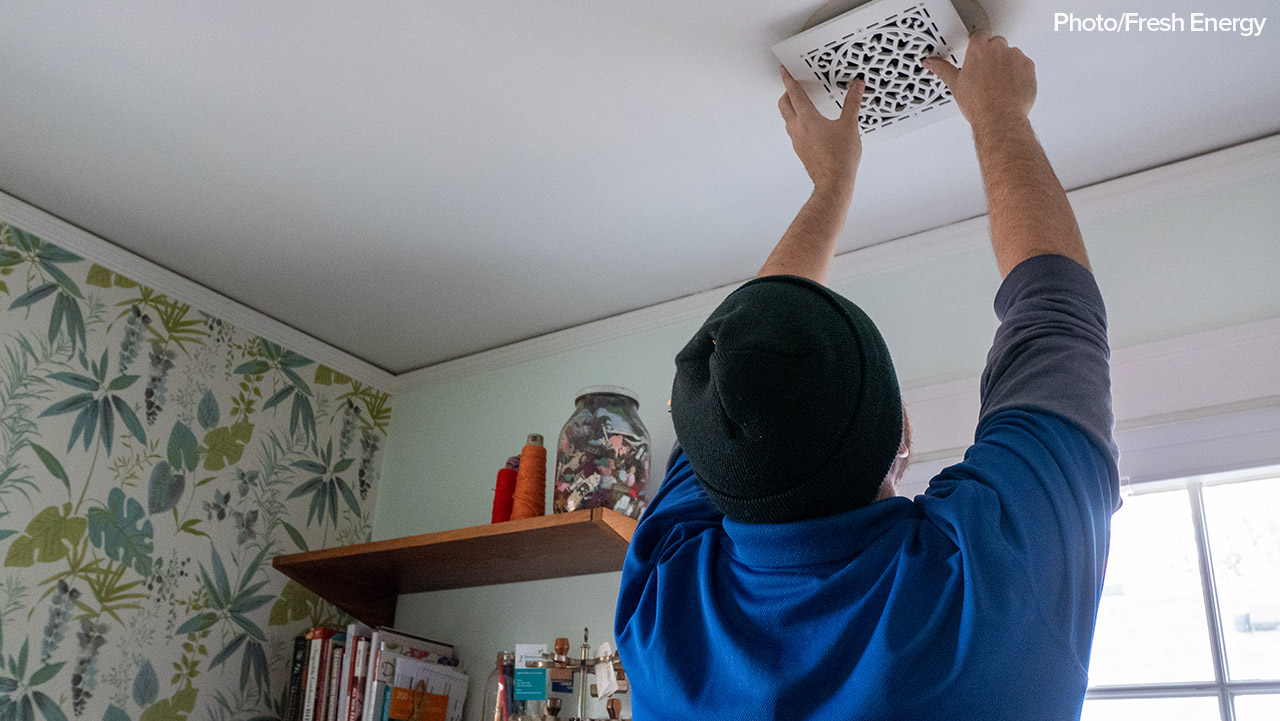
- Cut holes! Two installers spent the better part of the day communicating from the attic to the second floor via walkie-talkie to identify and cut holes for the air vents into the ceiling in each of the four upstairs rooms. They also cut a large square hole in the hallway ceiling for the air return. To do this they had to move around a ton of existing insulation while also navigating existing wiring and beams.
- Piece together the ductwork. Once the holes were cut, another technician began assembling the ductwork that would extend from the attic air handler to the holes.
- Install the unit and run lines from outside. Once the platform was built, the unit was brought upstairs and the team drilled a hole through the stucco to the outside to run the heating and cooling lines down to the outdoor unit. Once run, the outdoor lines were covered with a plastic cap that kind of looked like a drainpipe.
- Power it up. The unit itself needed to be wired, as well as a thermostat to control it on the second floor. The electrician wired all of this and installed a lightbulb in the attic, which is required by code.
- Surprise! More carpentry. A few days after the work was done, a different team came by to trim the bottoms of each of the upstairs doors to a specific height required by code to ensure air could flow even when the doors were closed. We had the choice between installing a vent above each door into the hallway or trimming the doors and ultimately opted to trim our doors, even if it meant my cute hedgehog doorstop was a little too short.
Zone 2: Main floor
Compared to the attic work, the MSP team made the first floor install look easy.
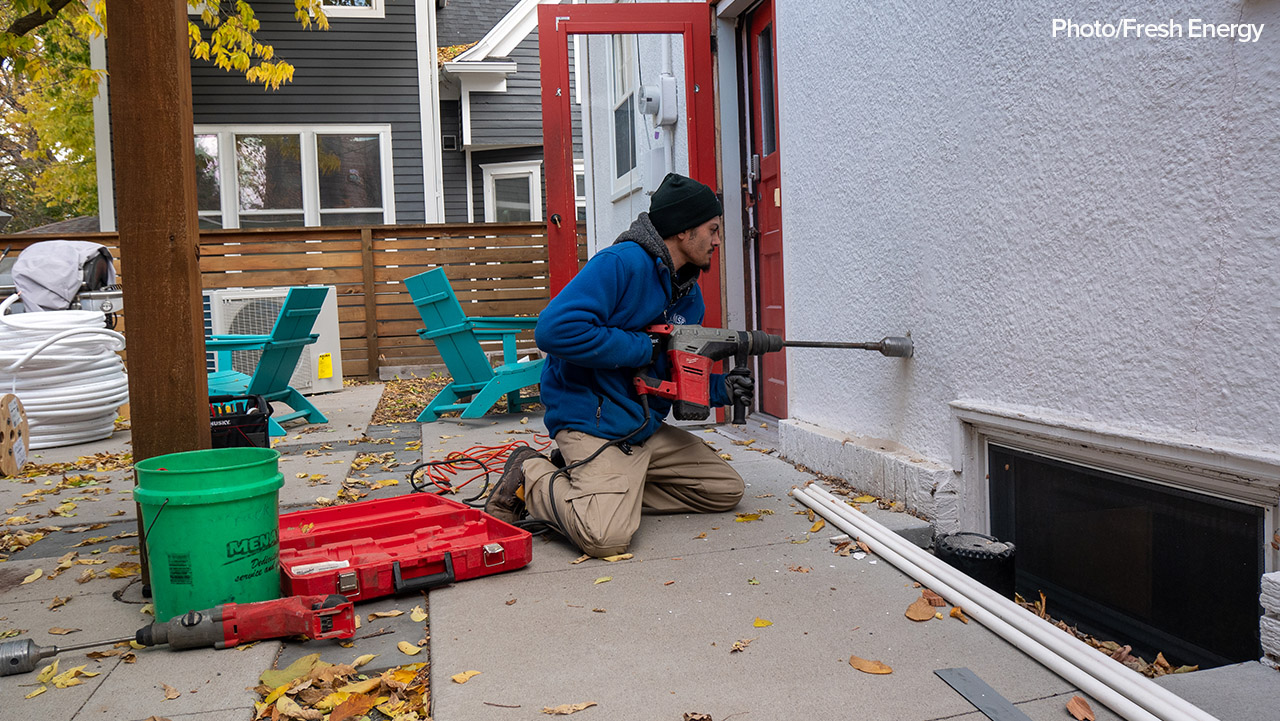
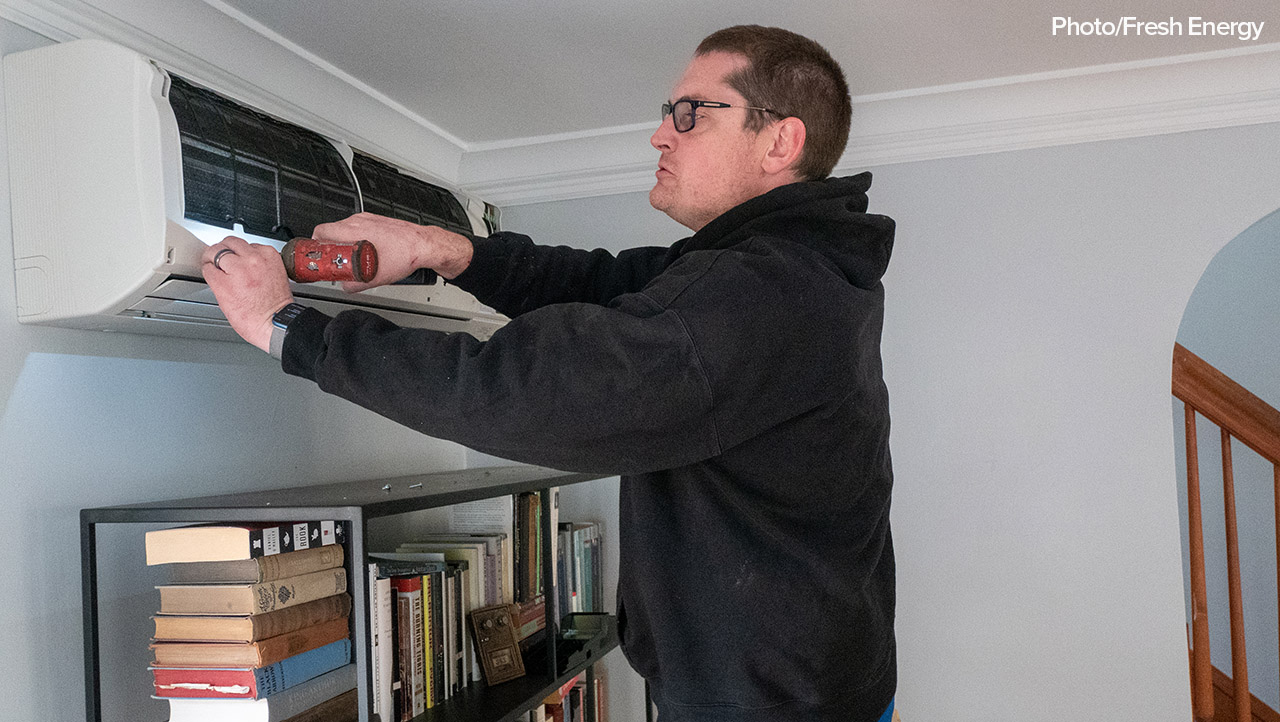
- Cut more holes! There’s nothing quite as stressful as hearing holes being drilled into your nearly 100-year-old stucco home, but the team needed two holes to run lines to and install the air handler.
- Mount the air handler. We opted to have the air handler mounted above a bookcase in the living room. Once it was in place an electrician ran electricity to it through the wall from a nearby outlet. This air handler is run by remote control, so no wall thermostat was needed.
- Run the heating and cooling lines. Because this air handler was on the other side of the house from the outdoor unit, running the lines was a bit more involved. The technicians opted to run them from the outdoor unit on the other side of the house, through the drop ceiling in our basement, back outdoors at ground level below the air handler, and then seven feet up to the air handler itself.
Outdoor Unit
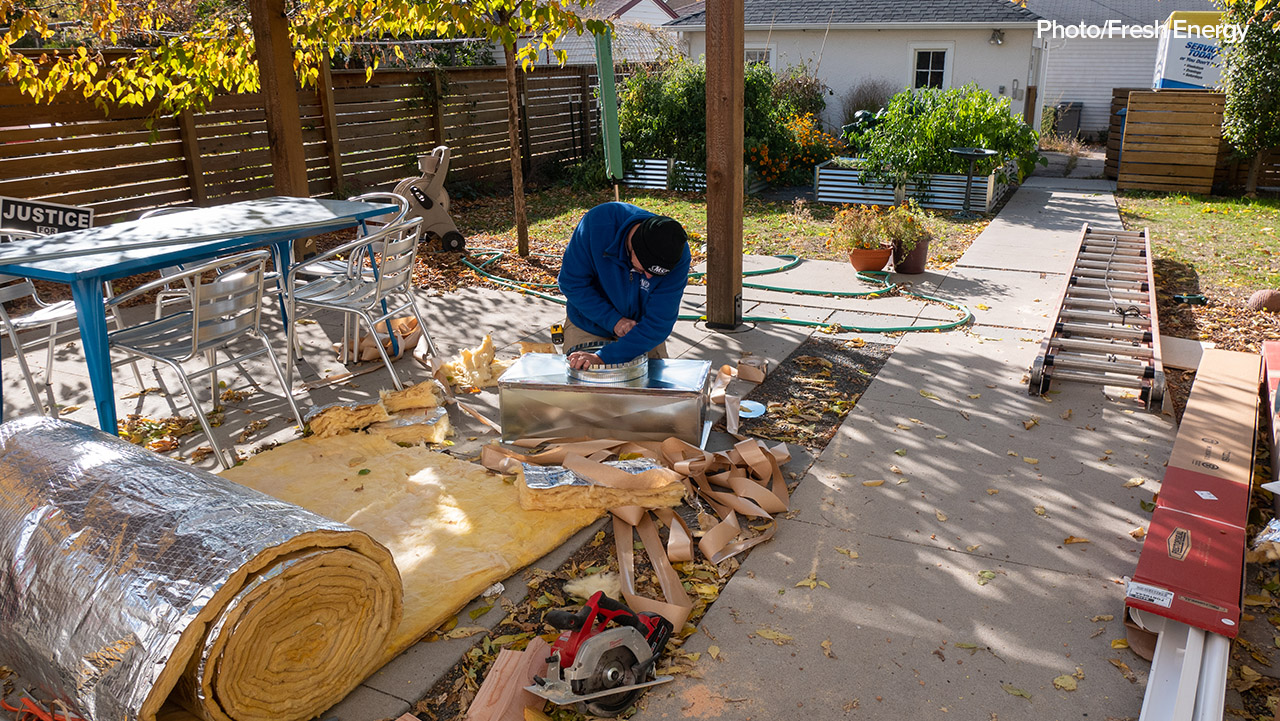
We opted to have the outdoor unit tucked into the space between the house and the fence on the north side of the property where it would be out of the way.
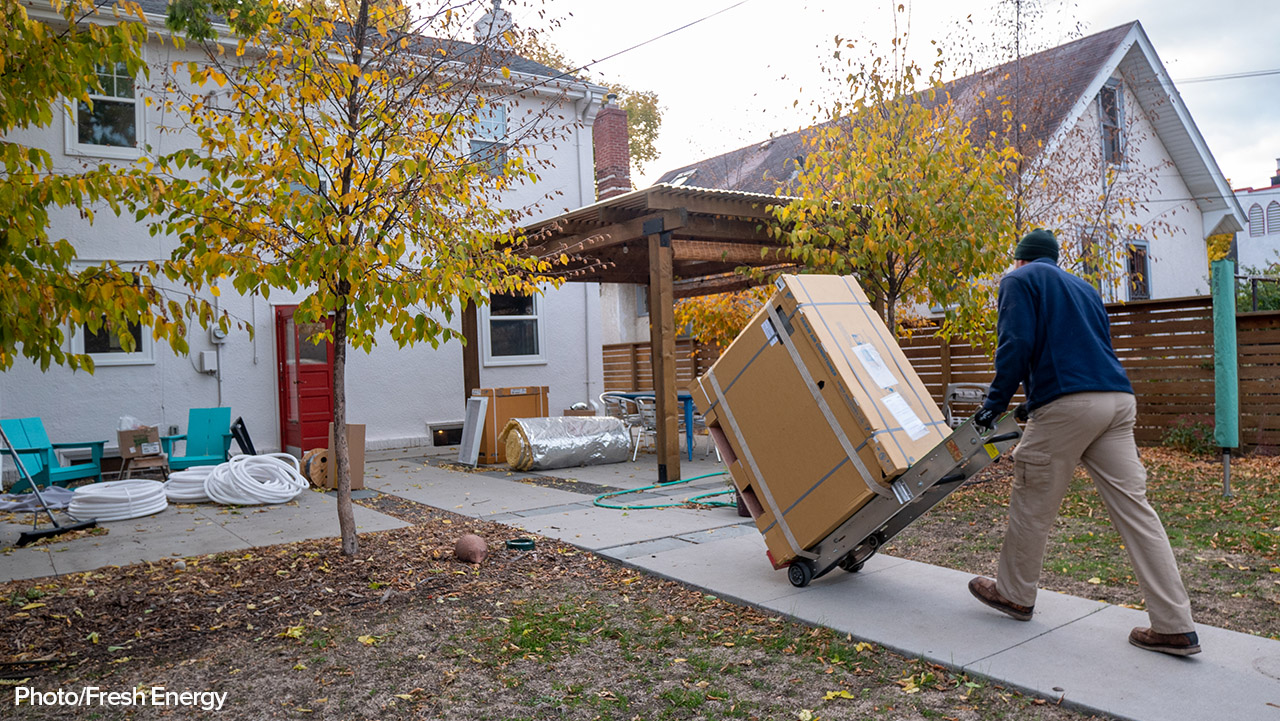
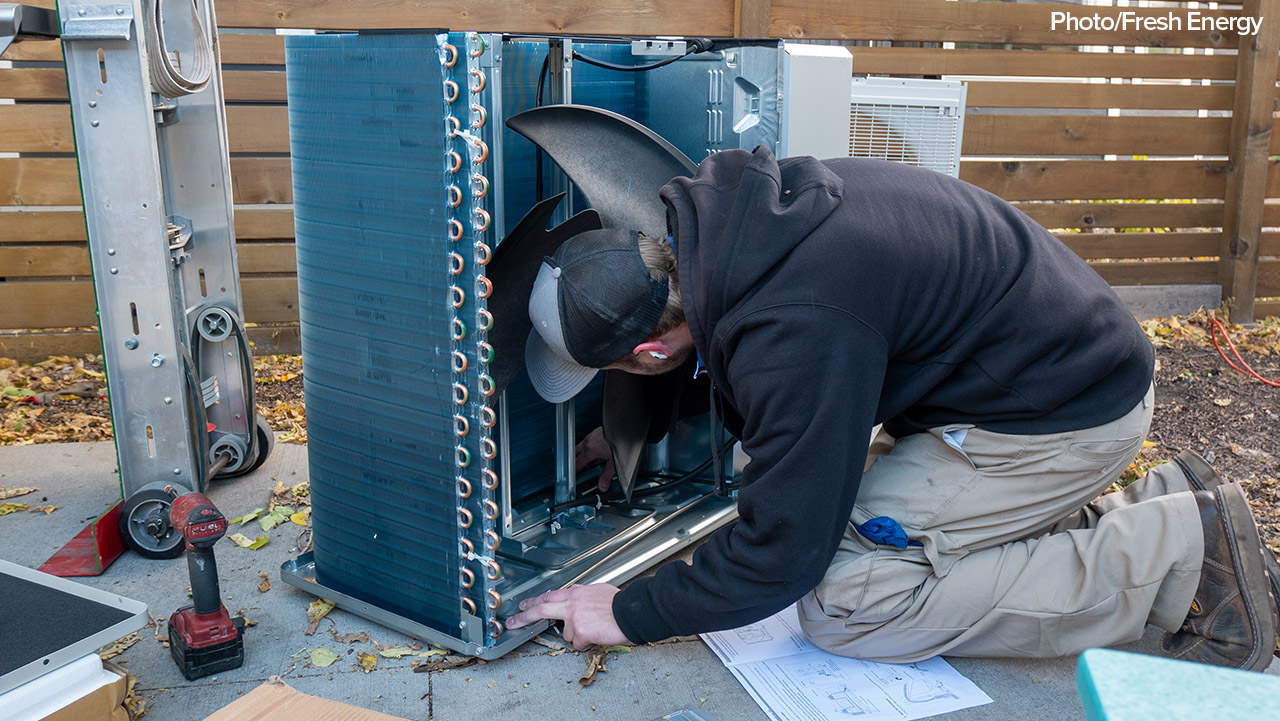
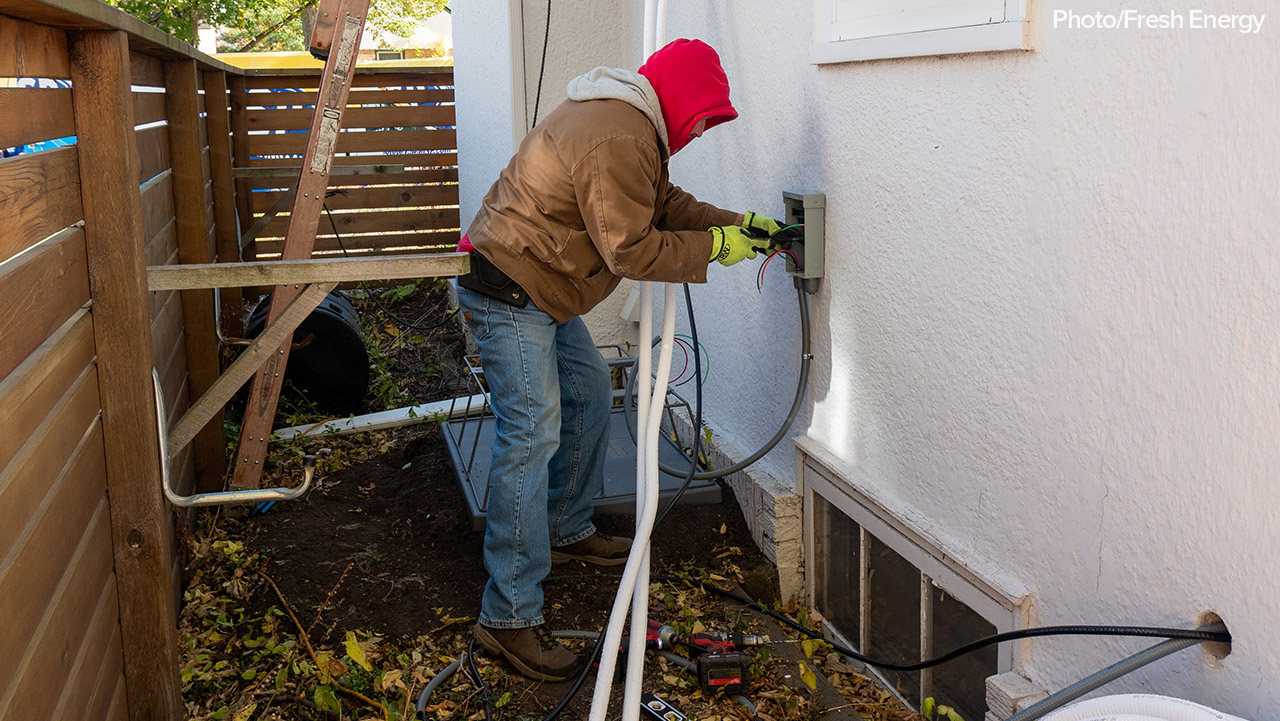

- Prepare the space. The outdoor unit sits about a foot of the ground on a metal frame above a plastic platform. The team leveled out the soil for the platform while the electrician prepared the electric for the unit.
- Some assembly required. A technician spent an hour or so prepping the unit itself for installation. I’ll admit, I’m not exactly sure what he was doing, but I was very impressed by the solid plastic fan blade.
- Installation. The unit was put in place, electricity was connected, and the heating and cooling lines were fed through the basement to serve Zone 2 and up the side of the House to serve Zone 1.
Heat pump hot water heater and induction stove installation
The process for replacing these two appliances was fairly similar so I’m grouping them together.
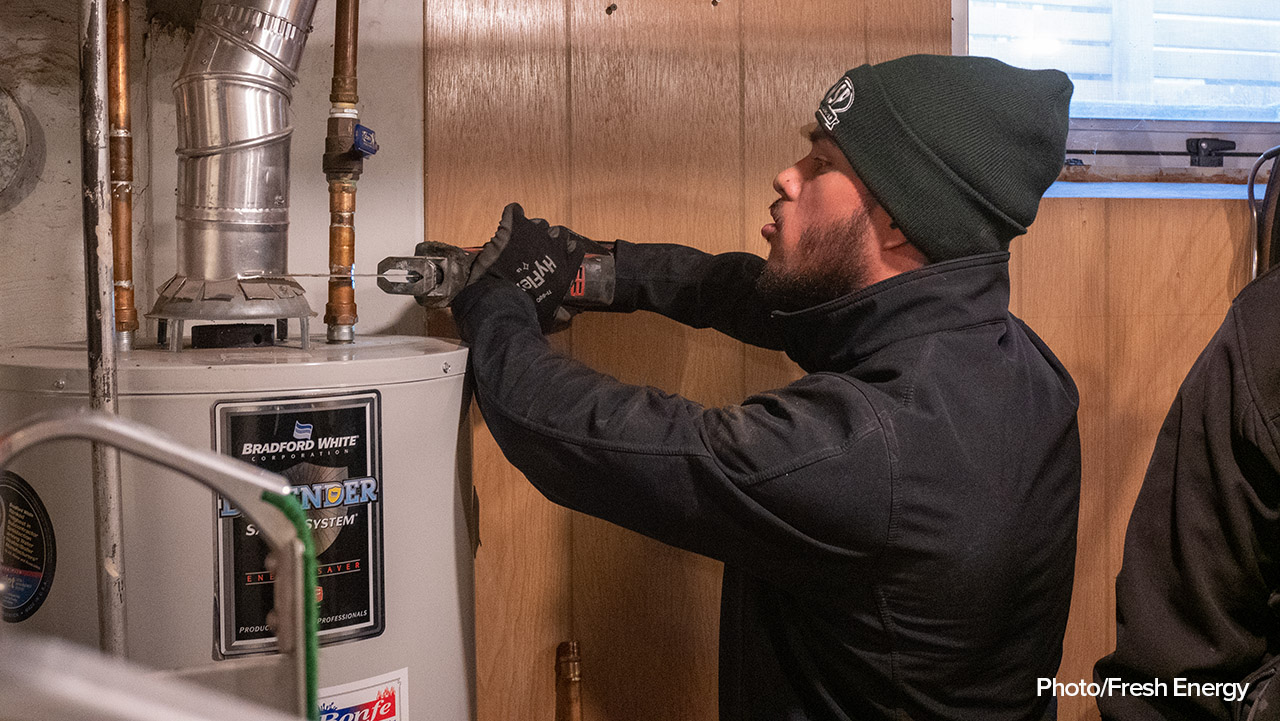
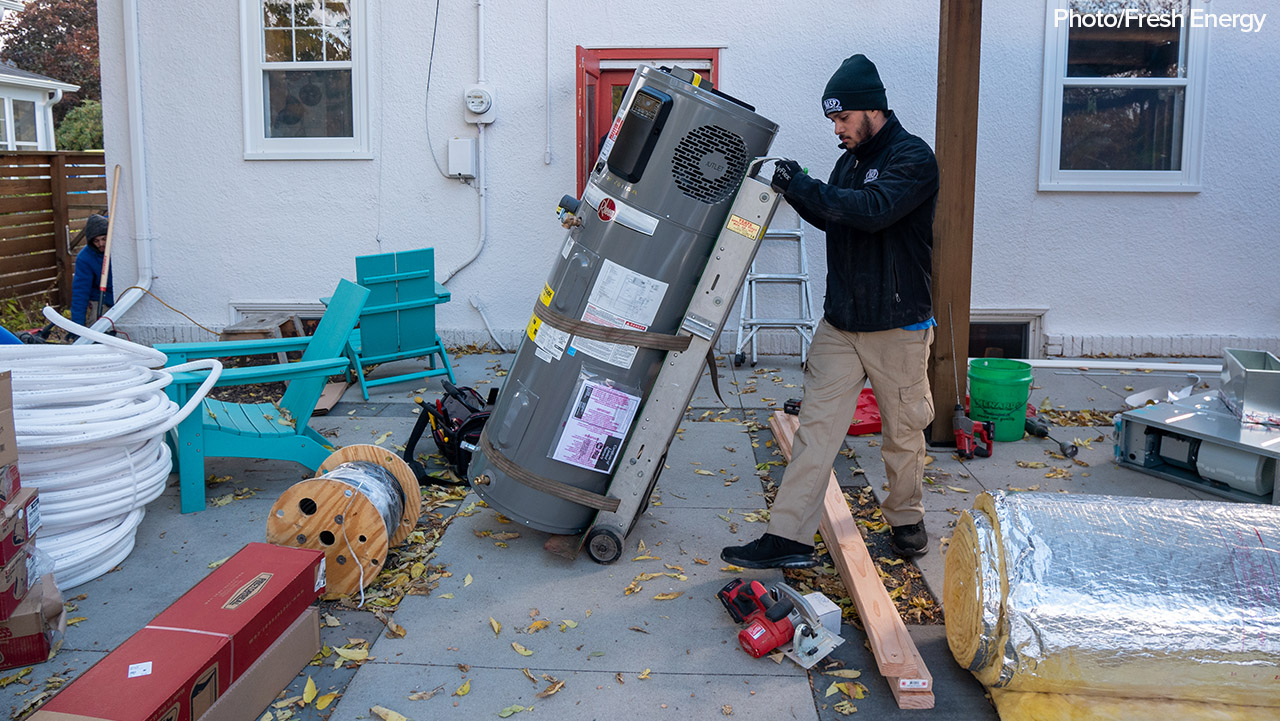
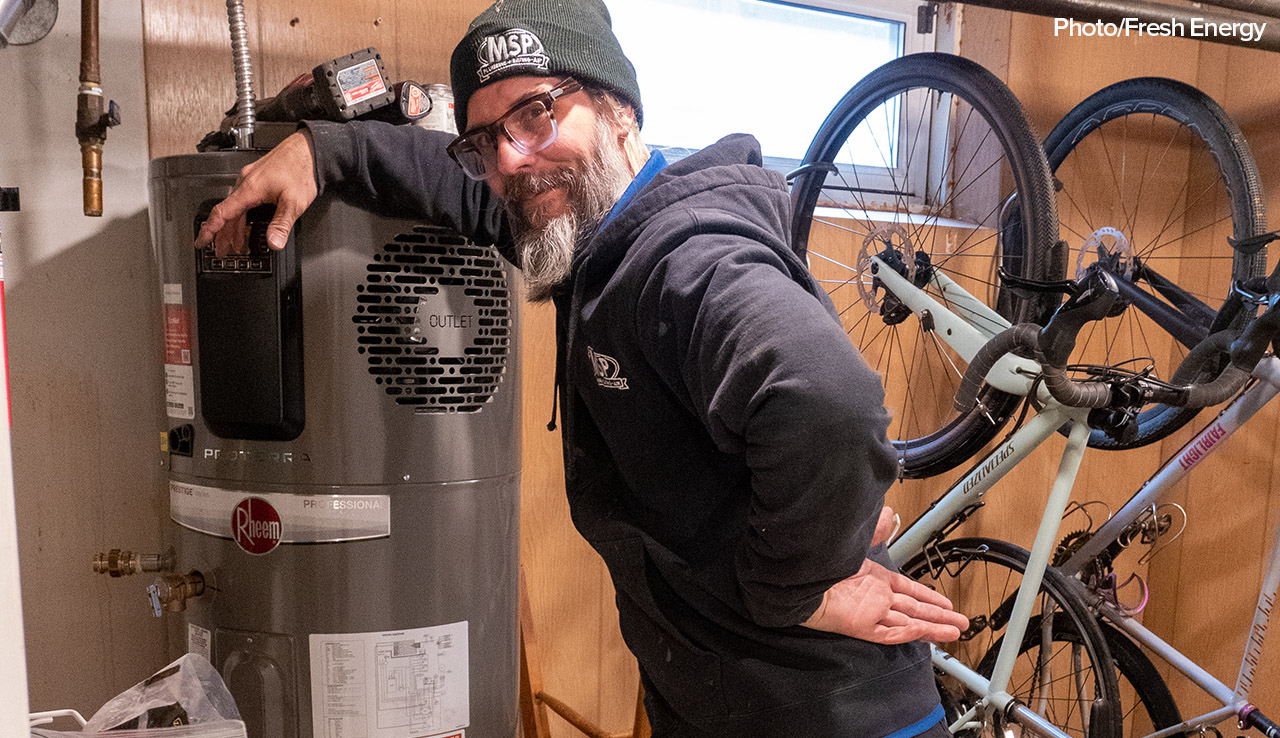
- Removal. Safely remove the old appliances by turning off the gas and in the case of the hot water heater, cutting the already drained pipes.
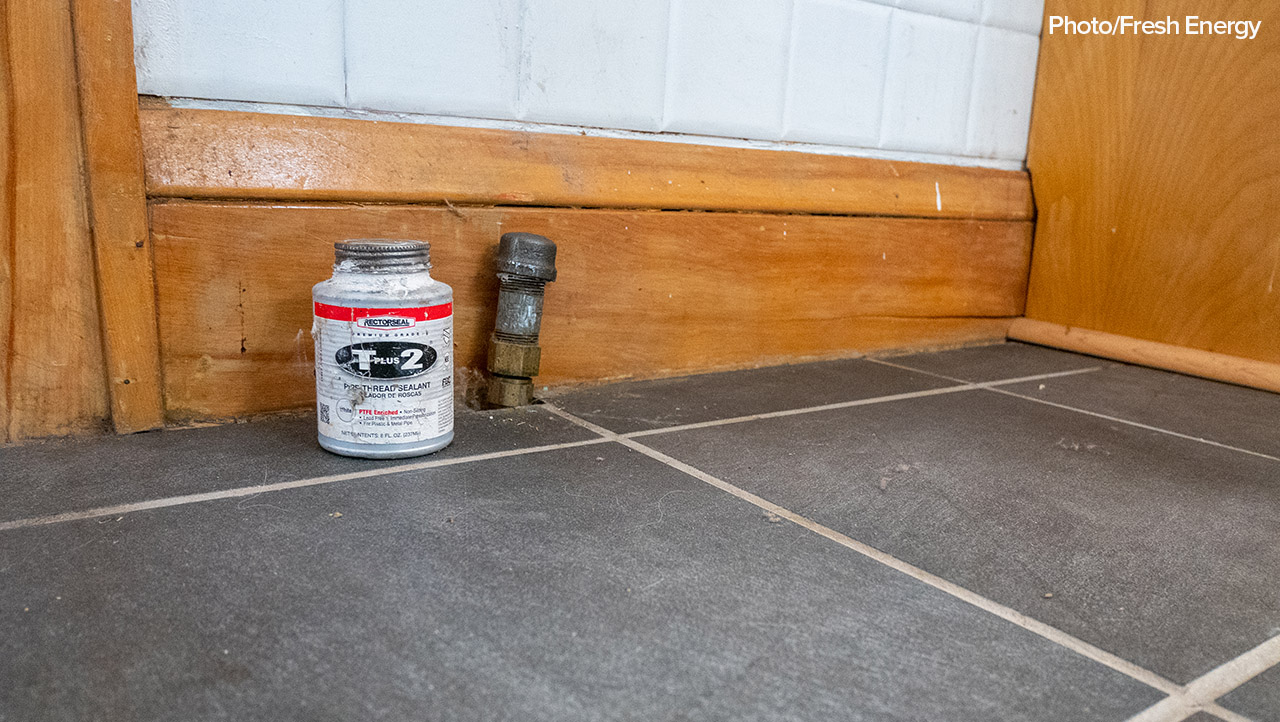
- Cap the gas! This was more exciting for me than for the technician. The gas lines leading to each appliance were smeared with “pipe dope” to make the pipe thread joint leak-proof and pressure tight, and then capped.
- Wiring. Both the new heat pump hot water heater and induction stove required 240-volt outlets, something neither space had.
Panel upgrade


In addition to upgrading our panel from 100 amp to 200 amp, we needed to get the house up to code which included a few significant changes like: grounding the water main, sinking two grounding rods, and installing an outdoor electric shutoff. As to be expected, this project left us without electricity for a few hours during the work itself and again when the Xcel Energy technician came by to reconnect the house. However, the trickiest part of the project was actually identifying and labeling what the new breakers turned on and off. We have since installed an energy monitor on a few of the key breakers to keep an eye on energy draw throughout the day.
Five months later…
So, did we achieve our goal? Did we reduce our carbon impact while reducing our bills? With some of the coldest months behind us, we’ve had the opportunity to really test out what our heat pump can do and I’m happy to report that so far, we have succeeded!
While it’s a little difficult to compare costs precisely due to changes in weather, usage, and prices, our heating bill has been the same or less than it was a year ago. When you consider that each therm of fossil gas burned emits 12 pounds of carbon dioxide, and each winter we had been burning, on average, 1,190 therms of fossil gas, our household carbon emissions from fossil gas will be reduced by 6.6 metric tons each winter. And as our electricity supply gets cleaner and cleaner—thanks in part to the new 100% clean electricity law!—the carbon reductions associated with electrification will continue to grow.
Carbon impact aside, one of the first questions I get asked is about our energy bills. Because the price of gas and electricity changes, I can’t definitively say we’ll always pay less or always pay more. But so far, we’re breaking close to even.
Another question we get asked is about our backup heat on cold days. While the upstairs zone does have electric resistance heat built in, we have used our boiler as additional backup heat for seven intermittent days during very cold spells—and we’ve since learned we probably didn’t need to.
So, is electrification right for you? It’s important to note that heat pumps might not be right for everyone’s use case or home, but I hope our experience has given you some of the tools you need to ask questions and make an informed decision. If you’re confident in your weatherization and find the right contractor who can design an efficient and effective system for you, heating electrification is an impactful way to save some money while doing good.
If you made it this far through the blog post, you’re probably realizing I don’t have any big tips or tricks to share. Each project is so unique, there’s no one-size-fits-all solution! Just remember that the ideal order of operations is to first air seal and insulate and then install a heat pump—not the other way around! And if I were to offer one piece of insight, it is to find a contractor with a deep understanding and appreciation of heat pump technology to help you on your journey. Happy trails!